Stereo Matching and Depth Map Creation on the Vision Pro
TLDR: I implemented Stereo Matching on the Vision Pro using RAFT-Stereo and visionOS 26! Source code is here!
With the recent release of visionOS 26 at WWDC 2025, Apple has finally given developers access to the right camera on the Vision Pro (at least, developers with an enterprise license). This greatly expands the capability of the Vision Pro for environment understanding and registration by enabling depth to be calculated from a rectified stereo pair (see binocular vision and epipolar geometry). These last few days, I’ve been trying to put together a reasonable pipeline for stereo matching and, ergo, depth map calculation on the Vision Pro. While calculating depth still eludes me, I at least have a reasonable pipeline for disparity estimation on the Vision Pro.
(Note: I’m going to use the Swift version of ARKit throughout this article so that the syntax is a bit easier to follow. There’s also a C API that might be more useful for developers building in support to existing libraries.)
Getting Frames from the Main Camera on the Apple Vision Pro
The first step to doing any type of depth or disparity calculation on the Vision Pro is to get camera frames from both the left and right cameras using the ARKit API. The “Accessing The Main Camera” Xcode project from Apple provides a good codebase to start from, but I’ll briefly explain the process here as well.
In ARKit, you can instantiate a session (ARKitSession) that consists of multiple providers (DataProvider), each delivering some type of AR data to the application. A basic example would be a WorldTrackingProvider that provides information about the device pose and “anchors” in the user’s surroundings (I would imagine this is what Unity is using under the hood to position the XR camera). When you want to access camera data, you instantiate a CameraFrameProvider and add it to your ARKitSession in session.run([cameraFrameProvider, <whatever other providers you need>]). After you start the session with your frame provider (ensuring that the frame provider is supported with CameraFrameProvider.isSupported), you listen to frames by creating an async for loop over cameraFrameProvider.cameraFrameUpdates(for: someFormat), where someFormat is a format picked from CameraVideoFormat.supportedVideoFormats. In visionOS 26, you have access to CameraFrameProvider.CameraRectification, so make sure you pick a video format that’s stereo rectified. This eliminates the need for a library like OpenCV to stereo rectify the left and right image feeds (in technical terms, aligning the epipolar lines to be horizontal).

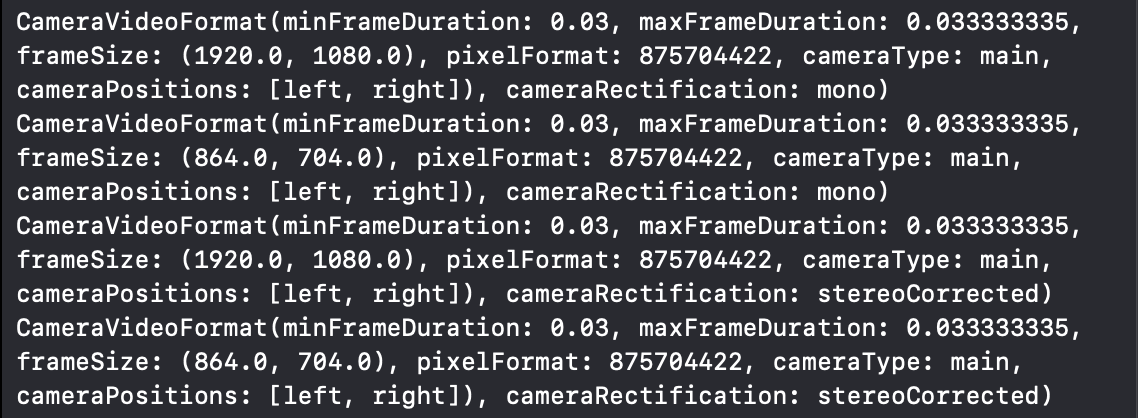
Figre 1: Some examples of pixel formats available on the Vision Pro. The 864 x 704 pixel, stereoCorrected format is probably the most useful for this tutorial. Pixel formats are in FourCC format, so when you see “875704422”, it’s just the int32 representation of “420f” (YUV 4:2:0 chroma subsampling or kCVPixelFormatType_420YpCbCr8BiPlanarFullRange).
Once you have your main loop, you can access “samples” (a bundle containing the image, camera intrinsics, and camera extrinsics) from the left and right cameras using cameraFrame.sample(for: .left) and cameraFrame.sample(for: .right) (the latter is new in visionOS 26). You can access the image from a sample as a CVPixelBuffer through sample.pixelBuffer (Xcode 26 will yell at you for this, since CVPixelBuffer is deprecated and being replaced with CVBuffer despite its lack of support in other frameworks… foreshadowing). Now that we have the images, we have to figure out a way to calculate disparity per pixel so that we can calculate depth.
Calculating Disparity from a Stereo Pair
Disparity refers to the distance a pixel travels along the x axis between the left and right camera in a stereo pair. In a stereo rectified image, (once again, an image in which epipolar lines are all horizontal), disparity is also the distance a pixel travels along its epipolar line, which has a lot of importance for calculating depth. The relationship between depth and disparity is inversely proportional (assuming the same principal point in both cameras):
\[\text{depth} = \frac{\text{focal length} \times \text{baseline}}{\text{disparity}}\]I spend a lot of time thinking about ways to convert stereo pairs of images to disparity maps, as it’s an important first step in photogrammetry and stereo reconstruction. There are a multitude of options for this problem including classical approaches (StereoBM and StereoSGBM in OpenCV, PatchMatch stereo, etc.), ML approaches (the cutting edge FoundationStereo, StereoNet from Google, RAFT-Stereo, etc.), and even combined approaches (PatchMatchNet). StereoBM is often the first choice of developers due to its integration with OpenCV and fast computation, but I find it leaves a lot to be desired in user experience (you have to spend a lot of time tuning the parameters) and pixel density. I chose to implement RAFT-Stereo for this experiment due to its relatively fast inference time (~45ms on neural cores) and comparatively dense estimation. There’s even a paper that expands RAFT-Stereo to 100+ FPS by warm-starting the model on previous frames, but there’s no PyTorch implementation, so this remains as an exercise for future work.
Bundling RAFT-Stereo for Vision Pro
In today’s world, there’s so many ways to run a machine learning model on embedded hardware. The option that I like the most (and that I wish had more widespread adoption) is ONNX (Open Neural Network eXchange), but interoperability sometimes begets inefficiency, and I realized that my only option was going to be a pure CoreML model to leverage the Neural Cores on the Vision Pro. (Yes, ONNX has a CoreML backend, but CoreML tools dropped support for ONNX a while back and operation types like GridSample don’t seem to have support for conversion…)
So, I set out to convert the RAFT-Stereo PyTorch implementation to a CoreML model using coremltools. Unfortunately, naïve conversion of the real-time model (specifically using torch.jit.trace) did not work due to a 7 dimension tensor in the upsample_flow function because CoreML only supports 5D tensors (torch.export.export didn’t work either because the model was in the TRAINING dialect even though I put the model in eval mode…). The 7D tensor gets passed through a softmax layer, so I took great care in ensuring model functionality was preserved when reshaping. After solving that issue (and switching corr_implementation to reg instead of alt), the torch.jit.trace method for conversion worked like a charm, and I was able to save the model to a .mlpackage (specifically on 512x512 color images).

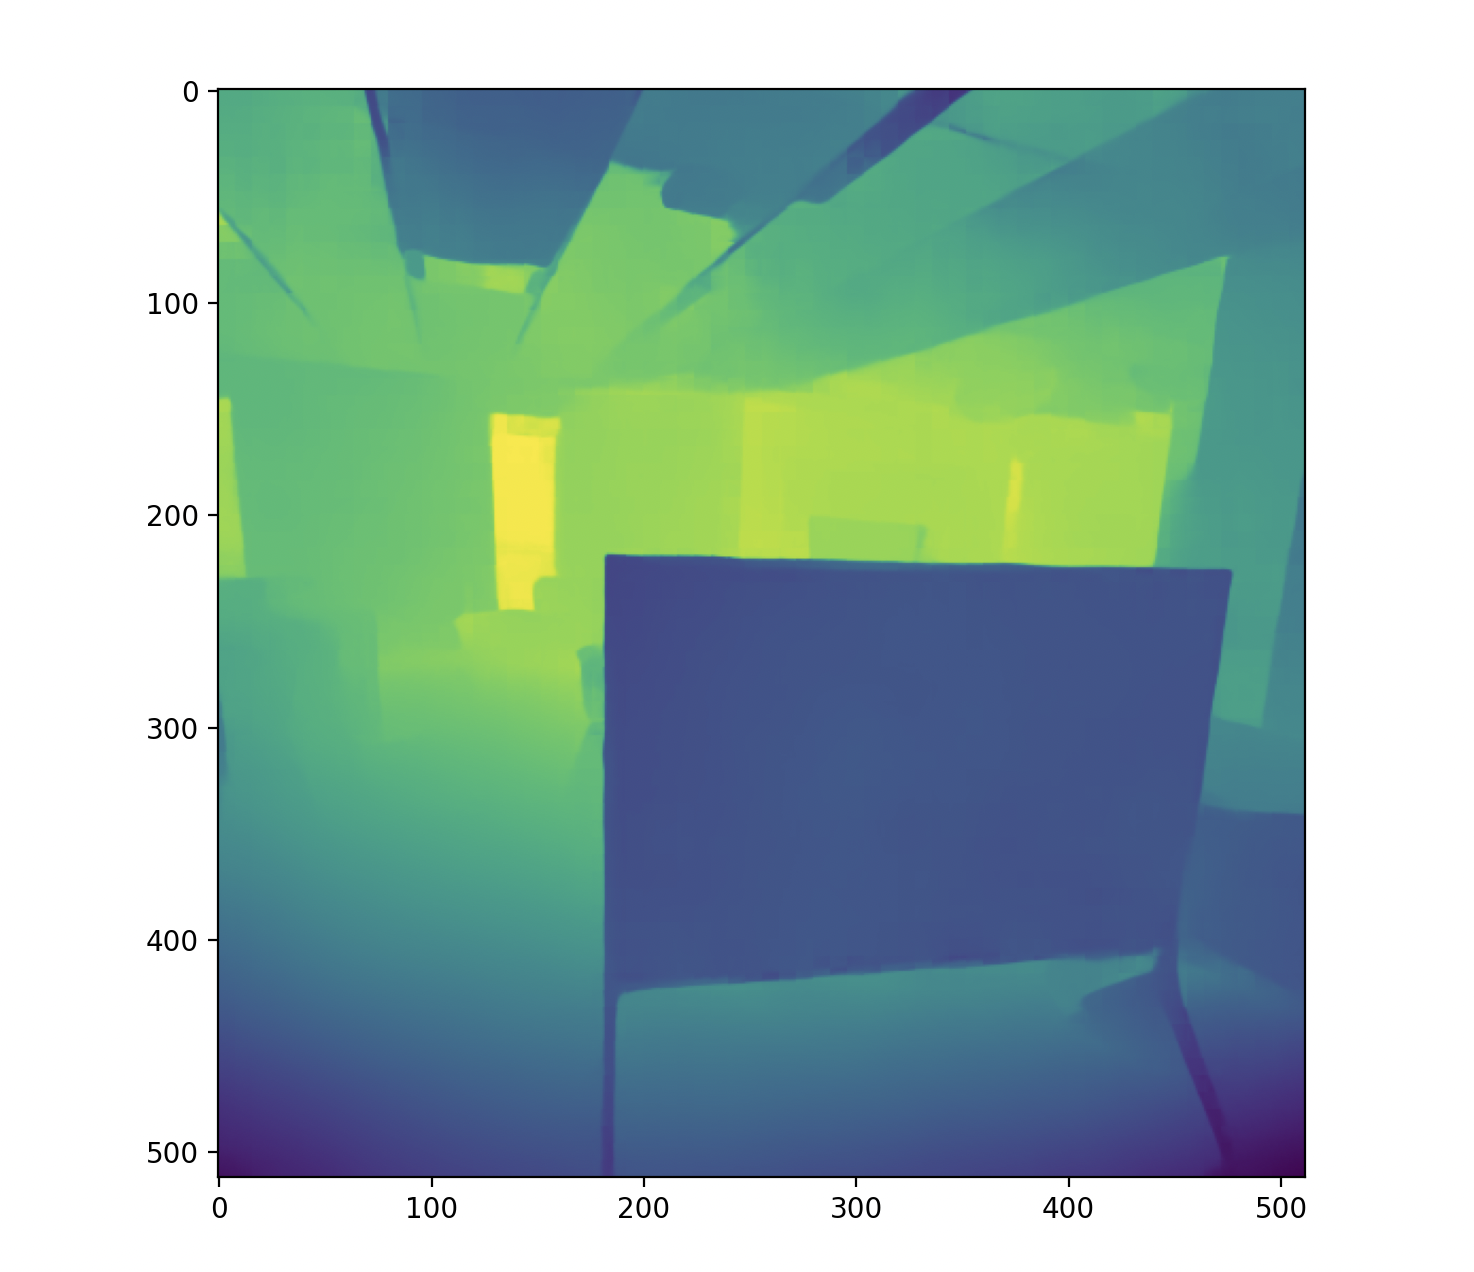
Figure 2: Example output from my RAFT-Stereo CoreML model run on 512x512 images. The underlying stereo image was taken from a spatial video captured on Vision Pro.
Note: I know ExecuTorch is designed to simplify situations exactly like this, but for some reason I couldn’t get the Swift package to work with visionOS. The xcframeworks compiled just fine with the iOS CMake toolchain, but the Swift package wouldn’t cooperate. (Also the XNNPACK backend wouldn’t build for some reason…)
Testing the RAFT-Stereo CoreML Model
After I was able to produce the RAFT-Stereo CoreML model, I wanted to make sure that I was able to run it somewhat efficiently on hardware. Some basic tests with coremltools in Python (see Figure 2) validated that the output was consistent with what I would expect, so I knew that the model was working properly at a mechanical level at least. Running some performance reports on my Mac indicated that most of the network modules were running on neural cores and that the median inference time was around 45ms, which sounded fantastic to me. Unfortunately, it appears that the neural cores on the Vision Pro are not quite as robust: performance tests on device showed that the majority of modules were running on GPU with a median inference time of around 135ms. I came to learn that this is due to some 32-bit float (FP32) weights sticking around in the model. I tried my best to fix this by turning off the mixed_precision flag in the model and exporting the CoreML model with compute_precision=coremltools.precision.FLOAT16, but nothing seemed to fix it. Perhaps quantizing the model with PyTorch before tracing would be more productive. Either way, the model was within a reasonable margin of latency for me, and I wanted to implement a full pipeline with camera capture and the model to get disparity maps on the Vision Pro.
Putting it All Together
I started by duplicating the “Accessing the Main Camera” demo project from Apple and adding my Enterprise.license file. A breaking change in Enterprise API main camera access that doesn’t seem to be documented anywhere is that NSMainCameraUsageDescription has replaced NSEnterpriseMCAMUsageDescription in Info.plist, so make sure you add a usage description under that key. (Also be sure you install the Metal toolchain for visionOS 26 because sometimes it doesn’t install by default and your application fails silently to a runtime error. Ask me how I know!)
Once the basic application was running (and after checking the .right camera sample was available), I started modifying the code to rescale and crop the left and right CVPixelBuffer objects to 512x512 for model inference. (I used my local LLM for help at this point since CoreVideo and CoreImage can sometimes trip me up.) After verifying that the buffers were scaled down to 512x512, I tried to import the model by dragging the .mlpackage into my Xcode project. The default initializer in the automatically generated Swift class for the model caused the runtime error “error: ANE cannot handle intermediate tensor type fp32”, which I figured was related to the mixed precision issue I saw in my model tests. To get around this, I simply passed a MLModelConfiguration with computeUnits set to .cpuAndGPU in the initialization function and the error went away.
After that, all I had to do was implement a function that converted the MLMultiArray that came out of my CoreML model to a CVPixelBuffer for presentation, and boom! I was able to get a ~9fps feed of disparity calculation on the Vision Pro!
Note: Yes, I know CVPixelBuffer is deprecated in visionOS 26. Unfortunately, it appears the CoreML API has not been updated to accept CVBuffer objects yet, so I have to stick with CVPixelBuffer objects in the meantime.
The Future and Mistakes Made
The obvious next step for stereo matching on the AVP is to convert the disparity map to a depth map via the standard equation and then produce a point cloud using the camera intrinsics. I’m working on an implementation that uses Accelerate.framework to speed up the vector operations and sends the results to Unity after computation, but the extrinsics calculations and interop are still confusing to me.
Of course, my implementation is inefficient in some areas. The most obvious area of improvement is in the CoreML model. If I could get it to be entirely FP16, I could utilize the neural cores and hopefully get the inference time back into the ~50ms range; I just haven’t figured it out yet. Additionally, my implementation of multiArrayToRGBA is almost certainly inefficient given that I’m performing the conversion in a big for loop (the vDSP methods in Accelerate.framework may be much faster). I did my best to use CVPixelBufferPool allocators where possible and reused the CIContext for rendering, but perhaps someone with more iOS/visionOS development experience could improve the code.
Suffice to say, the source code is available on GitHub and I welcome any type of improvement to my code or future innovation. Remember to include your Enterprise.license, and happy developing!
Enjoy Reading This Article?
Here are some more articles you might like to read next: